
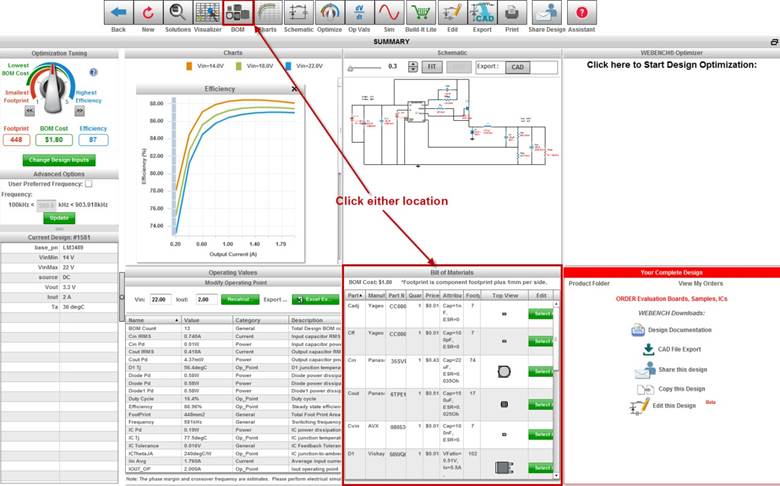
BOM
The BOM (Bill of materials) panel may be accessed by either clicking on the BOM icon
or by clicking anywhere inside of the Bill of Materials panel.
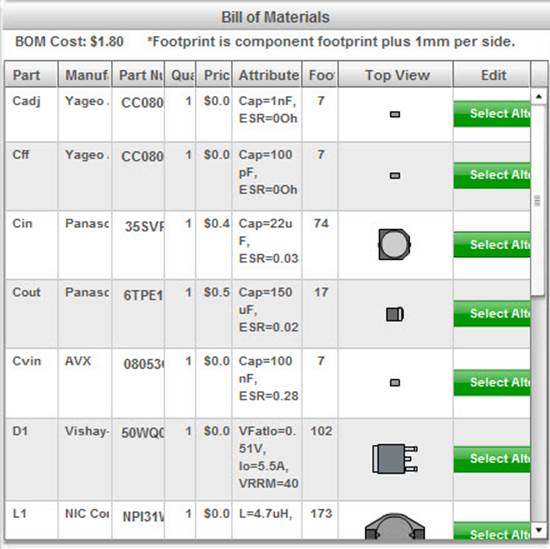
The BOM has a complete list of the devices used for building the schematic shown for the design that you selected. Each component has the following information available:
1.) Part – The name of the component used in the schematic
2.) Manufacturer – Manufacturer listed by the part source
3.) Part Number – Orderable part number from the supplier
4.) Quantity of each component
5.) Price – 1000 quantity price from the supplier
6.) Attributes – Characteristics of the component that are provided by the manufacturer.
7.) Footprint in square mm (1mm buffer on each side)
8.) Top view of the component
9.) Edit – Allows for selection of an alternate part of the same type (i.e. capacitor for capacitor). The IC is not included as the design was created based on the choice of the IC.
You can sort by any of the columns except for the Attributes column. You can also export the BOM to Excel by simply clicking on the gray Excel button.

Typical Step by step usage:
1.) Enter the BOM page by either clicking on the BOM button or the Bill of Materials panel.
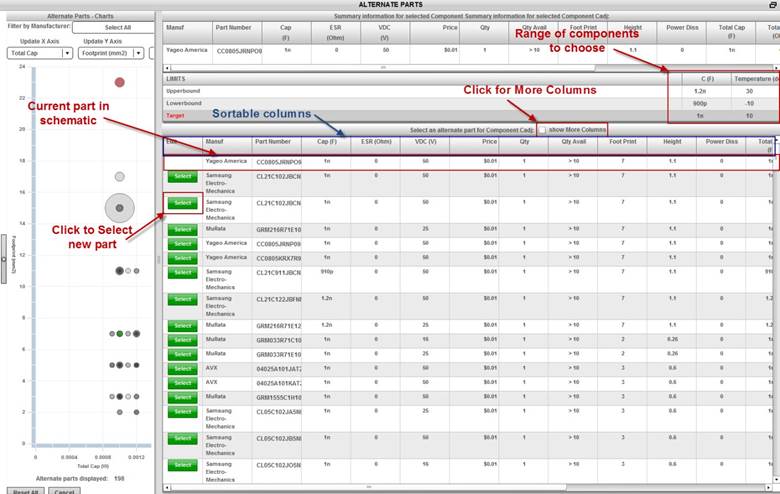
2.) Determine which component you would like to change. Click on the Select Alternate Part button. An interface will appear (changes with the component type selected) with multiple components that you can choose based on your preferences. You can sort by any of the columns displayed. You can also add more columns if there is a particular component property. The component currently in the schematic is the first listed component. You can also use the Alternate Parts – Charts if you prefer, on the left hand side of the window. The component list is limited by the range of values shown. Once you have found the component you prefer, you may choose it by clicking on the Select button.
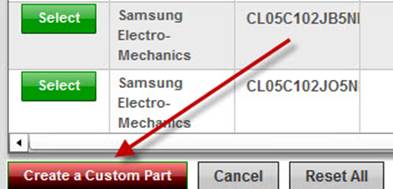
3.) Optional – If you have a specific component that is not listed, you can use the red Create a Custom Part button on the lower left of the list of choices. You can also use this to change the component value outside of the preset range. Please note that the design may have to be adjusted to the new value.
After clicking on the button, you will see an interface to provide the component information. The interface varies based on the component you are changing. This information will also be stored in your BOM for documentation.
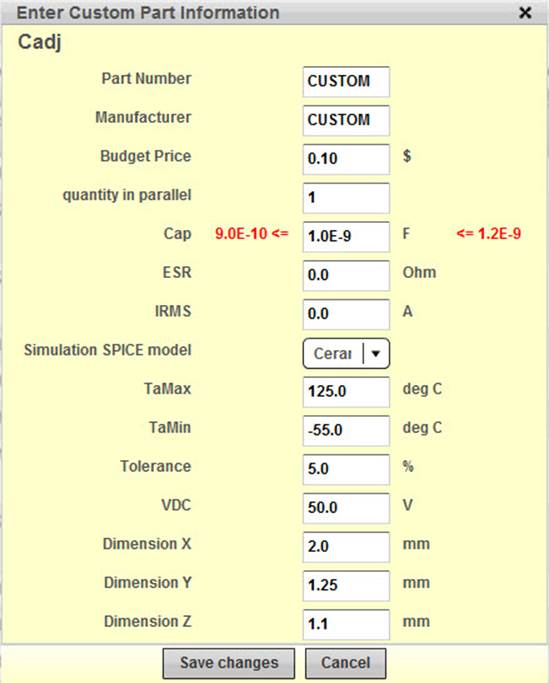
The custom part is added to your schematic once you click on the Save changes button. Note, the custom component is not saved in the place able component list. If you remove a custom component you must recreate the component again. This can occur if you further optimize the design.